Filtering the Visivi Map
There are thousands of images of your asset within Visivi, so to enable you to identify and view specific images, you can use the Map Filter tool.
The Map Filter tool allows you to filter by Date Range and by using the Advanced Filters, you can filter by Flights:
You can set a general date range for your search filter from 1 week of images upto 2 year of images.
A more detailed date range can be used based on particular project requirements.
|
1 |
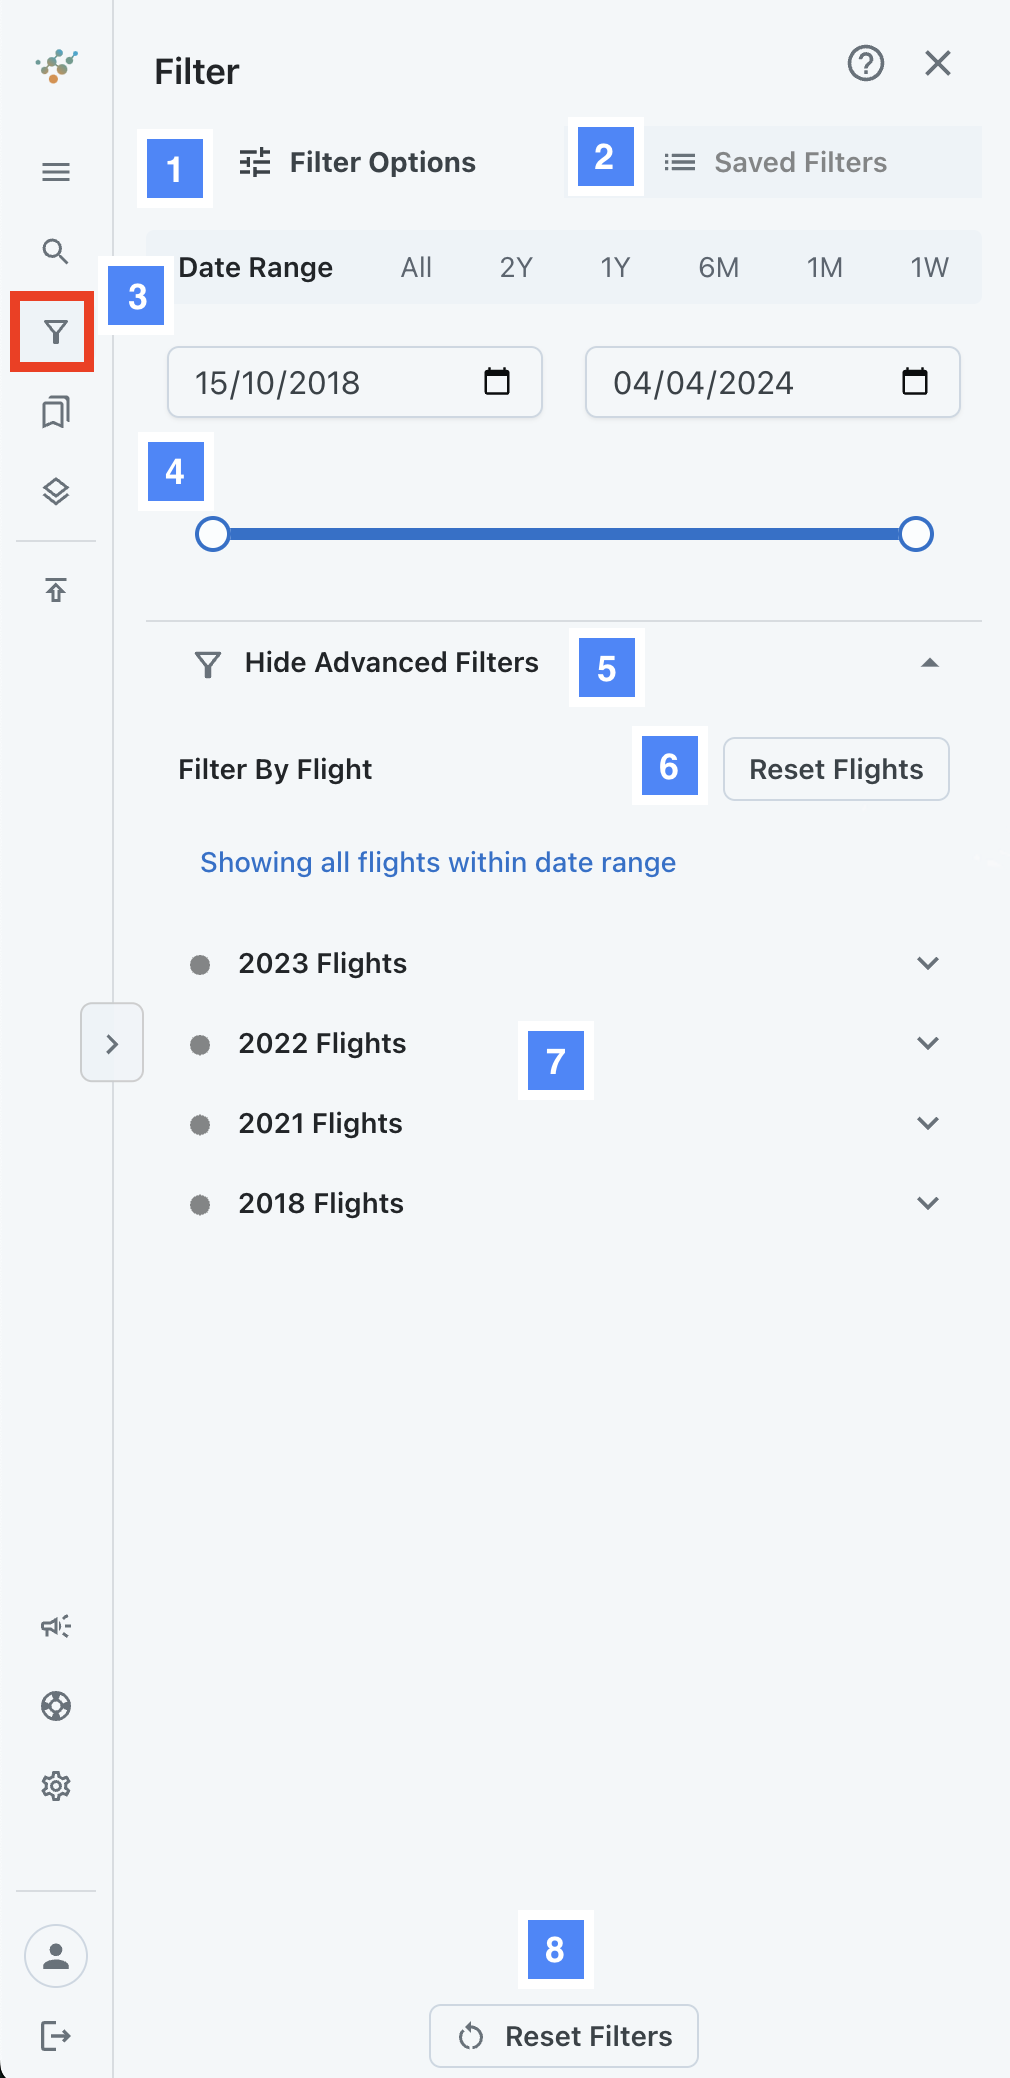
Filter Options: This tab provides all the filtering options that enable you to filter the data represented on the map. |
|
2 |
Saved Filters: This tab lists all of the filters that you have saved. A filter from this list can be selected and will apply all the saved settings to the filter and map. |
|
3 |
Date Range: You can set a general date range for your search filter from 1 week of images up to 2 year of images. |
|
4 |
Date slider: Alternatively the date slider can be used which shows an image date timeline as you scroll left to right. |
|
5 |
Advanced Filters: These provide further map filters than just a date range. For example, filtering by a specific flight date, or a survey type. |
|
6 |
Reset Flights: This will reset any selected flights from the advanced filters. Resetting these will then show all data on the map (within the date range specified above) |
|
7 |
Flight Dates: Flight dates are grouped into years and enable you to filter the map data to specific flight dates. When no flights are selected in the list will, the map will display all flight data that is within the date range specified above. |
|
8 |
Reset Filter: This button will reset the date range, as well as clear any specific flights that have been selected. Resetting the filter will trigger the map to show all data. |
Saving Filters
Saved Filters allow for the quick and efficient application of a predefined set of filters, eliminating the need to manually configure date ranges and flights on every occasion.
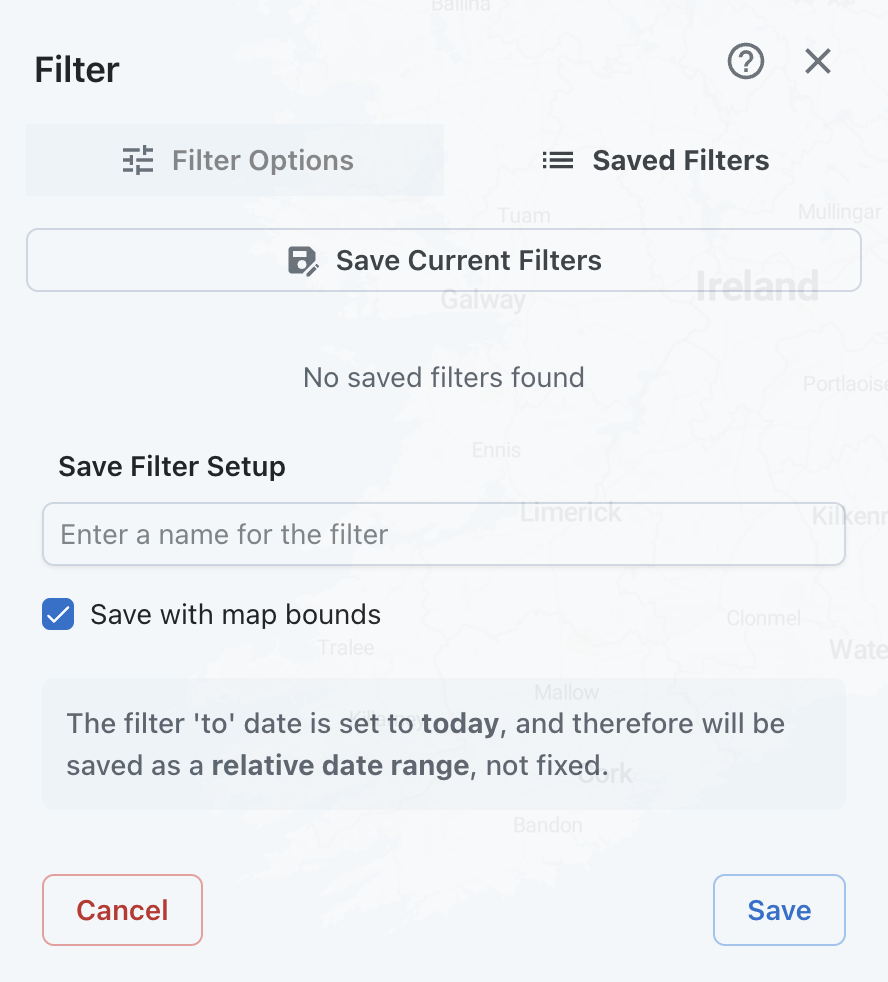
Once you have set your filters on the ‘Filter Options’ tab, click the “Saved Filters” tab and then click the “Save Current Filters” button. This will toggle the display of the form as shown above.
-
Enter a suitable name for your filter
-
Save with map bounds enables you to save your current map view bounds into the filter. Therefore, when you apply the filter next time, the map will zoom into these bounds
Your saved filters will be accessible from this same tab.